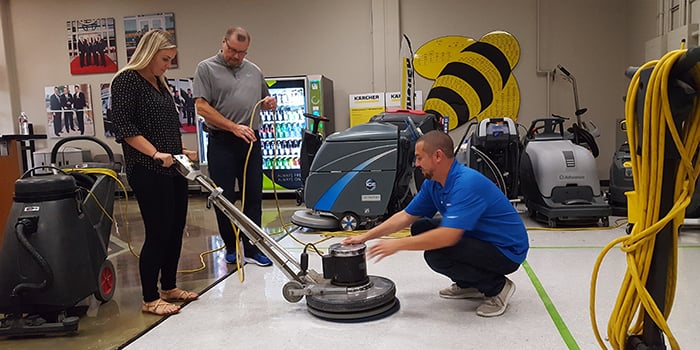
WAXIE Account Consultant Hope S. learns how to use a floor machine as part of a scrub & recoat training session at WAXIE San Diego
By: WAXIE Editorial Staff | December 11, 2019
A scrub & recoat procedure is integral to any resilient and hard floor care maintenance program. If done periodically it can improve the appearance of your floors without having to do the more time-consuming strip & refinish procedure as often.
Keeping your facility clean and safe is a lot of work, especially around the holidays when winter weather & tons of foot traffic can muck your floors up faster. When dirt, water and ice melt get tracked into your building your regular daily maintenance routine just can't keep up, which creates the potential for a slip and fall accident to occur. However implementing interim cleaning procedures makes it much easier for custodial staffs to preserve a consistent & high level of cleanliness, while maintaining safety for building staff & guests.

Key Steps in the Scrub and Recoat Process
1. Follow your daily routine resilient floor maintenance steps through dust mopping
2. Prepare scrub cleaner – adjust the dilution rate to determine the depth of scrub
- General-purpose cleaner: light dilution – 1 coat; medium dilution – 2 coats
3. Apply cleaning solution liberally
4. Scrub floor with a blue cleaning pad using either a floor machine or an autoscrubber
5. Pick up the slurry before it dries
- Mop & bucket – use a floor squeegee
- Wet/dry vacuum with floor squeegee and wand or front-mount squeegee
- Autoscrubber (rinse at the same time)
6. Thoroughly rinse floor
- Wet mop floor with neutralizer/conditioner
- Then wet mop floor with clean water one or more times as needed
7. Allow floor to dry
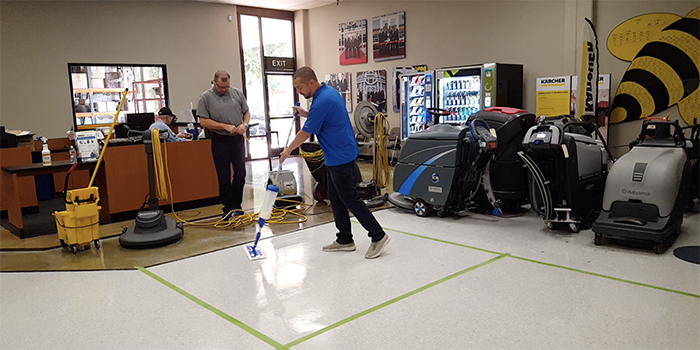
WAXIE Equipment Specialist Aaron W. shows how to lay down floor finish quickly & easily using the WAXIE Fast Glide™ Finish System
8. Apply floor finish
- Select the finish for your needs
- Use a clean finish mop or a low-lint rayon, or rayon blend mop, or the WAXIE Fast Glide™ Finish System
- Presoak brand new mops in plain water and wring out well prior to use
- Use a finish mop for applying finish only, not for other mopping procedures
- Line mop bucket with a clean, clear plastic trash liner to prevent contamination of finish and finish buildup in the bucket; AND
- Carefully pour finish into lined bucket; do not fill more than half full; AND
- Immerse mop in finish, wring out bottom half, OR use the WAXIE Fast Glide™ Finish System
- Never pour finish back into the original container (unless using the WAXIE Fast Glide™ Finish System)
- Make sure the area you are working is a manageable size (50-100 square feet)
- Outline area by lightly applying finish in a straight line to edges and corners on every other coat; stay away from walls on other coats by 3-9"; vary this distance for each coat to blend in finish and use caution to avoid getting finish on baseboards, etc.
- Fill in outlined area with a figure "8" motion
- Lay finish in even, thin to medium coats
- Turn mop over to access more finish
- Apply 2 to 4 coats

9. Dry time
- Recoat 10 minutes after the entire floor is dry to the touch
10. Use an air mover/floor fan(s)
- Let finish dry at least 5-10 minutes then use indirect air movement for faster drying time (direct air mover upward or away from work area)
- NOTE: Check for dust and loose items before using air mover
11. Burnish with floor pad (if recommended by the floor finish manufacturer)
- Some finishes can be dry burnished for enhanced gloss (1500 RPM or more) after the last coat is dry
- Do not spray buff floor for at least 24 hours
- Dust mop again, if necessary
12. Remove wet floor signs when floor is completely dry
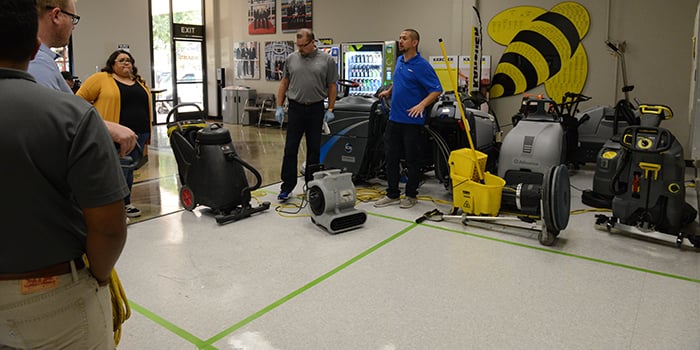
WAXIE Chemical Specialist John M. & Equipment Specialist Aaron W. lead a scrub & recoat training session at WAXIE San Diego
13. Inspect your work
- Replace any furniture, etc. that you have moved
- Report concerns and preventive maintenance needs to your supervisor
14. Clean up equipment
- Clean dust mop by vacuuming or shaking out dirt
- Apply and allow dust mop treatment to cure on mop head, if applicable
- Rinse out cleaning solution and rinse mops using neutralizer/conditioner several times if necessary
- Empty and rinse out mop bucket(s)
- Turn mop bucket(s) upside down in mop sink to dry
- Return supplies to storage area
- Wipe down floor machine
- Wipe down cord of floor machine and wet/dry vacuum
- Remove blue pad(s) and rinse or clean as needed, air dry
- Remove drive pad or brush from 175 RPM floor machine and hang it on the machine’s handle or a hook
- Remove slurry from wet/dry vacuum or autoscrubber
- Rinse out wet/dry vacuum or autoscrubber and clean squeegee and exterior
- Seal up finish mop in a clear plastic bag
- Clean or replace burnishing pad and leave on machine, if used